
Tablet Stand
Creating a tablet stand by laser cutting a flute cardboard
Physical Prototyping
Laser Cutting
October 17 2023 – October 26 2023
Individual Project for HCDE 451
Context
This project explores the laser cutting technique on flute material and utilized the materiality of flute to create a sturdy stand prototype for holding and supporting a tablet. The prototype is expected to be able to assemble and dissemble without any glue or scissors.
Design
Shape and Dimensions
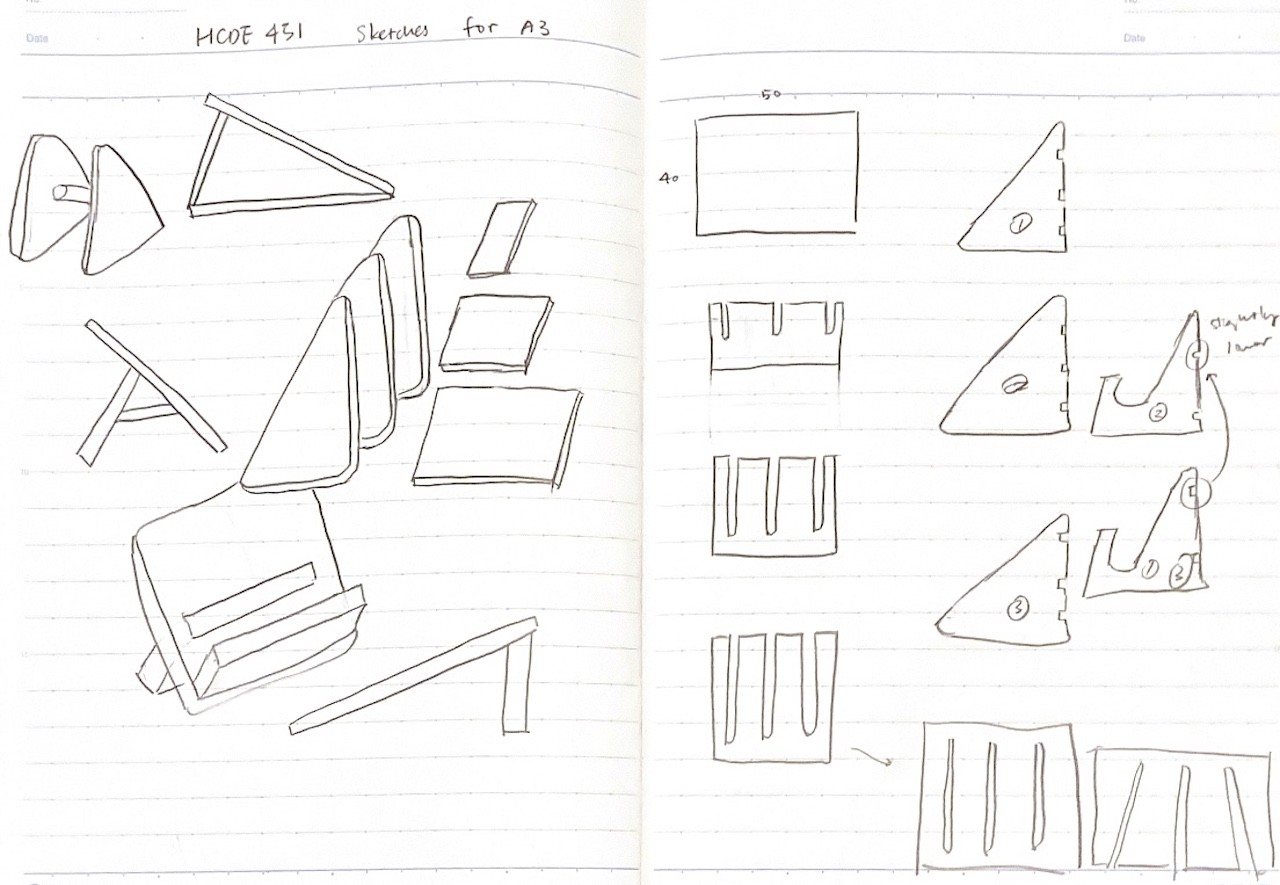
Since the stand should be able to support a tablet, the first thing that came to mind was to design the prototype with some triangular parts in it. I decided to not worry too much about the exact dimension of my first prototype because I wanted to figure out how to fit pieces together and how to make the structure stable.
Materials
First iteration: I used cardboard and scissors to hand make the prototype because the materials were easy to find and a low-fidelity prototype took less time to construct.
Second iteration: I was given one sheet of flute and two sheets of chip boards for this assignment. I decided to use flute cardboard because it is thicker and more structurally sound comparing to chip board.
Three Vertical Pieces
At first, I designed three triangle pieces to serve as the vertical structure of the stand, but then there would be nothing to prevent a tablet from sliding off. That’s why I designed a place on each one of the triangles for holding the tablet in place. I also designed two slots on the side of each triangle to create joints with the horizontal pieces.
Two Horizontal Pieces
The prototype would need horizontal components to keep the vertical pieces stable, so I designed two horizontal E-shaped pieces to fasten the vertical pieces with friction.
Prototype
Iteration #1: Handmade
The first prototype was made by hands, using cardboard and scissors, without applying any glues or adhesive. Based on my design, I roughly measured and cut the shape of one vertical piece, and then I revised the shape by experimenting with attempting to fit my tablet onto the piece. Once I got a satisfiable piece, I used it as a frame to create the other two vertical pieces. After I figured out the positions of these three supporting pieces, I made two E-shaped horizontal parts to hold the structure together. One mistake that I made was that I forget to consider the fact that the two vertical pieces on each side came together at the top from an angle, so the slots on the horizontal pieces were parallel to each other and made the vertical pieces hard to fit in. Another problem was that the width of the slots was cut too wide so that the friction between materials was not as strong as I imagined.
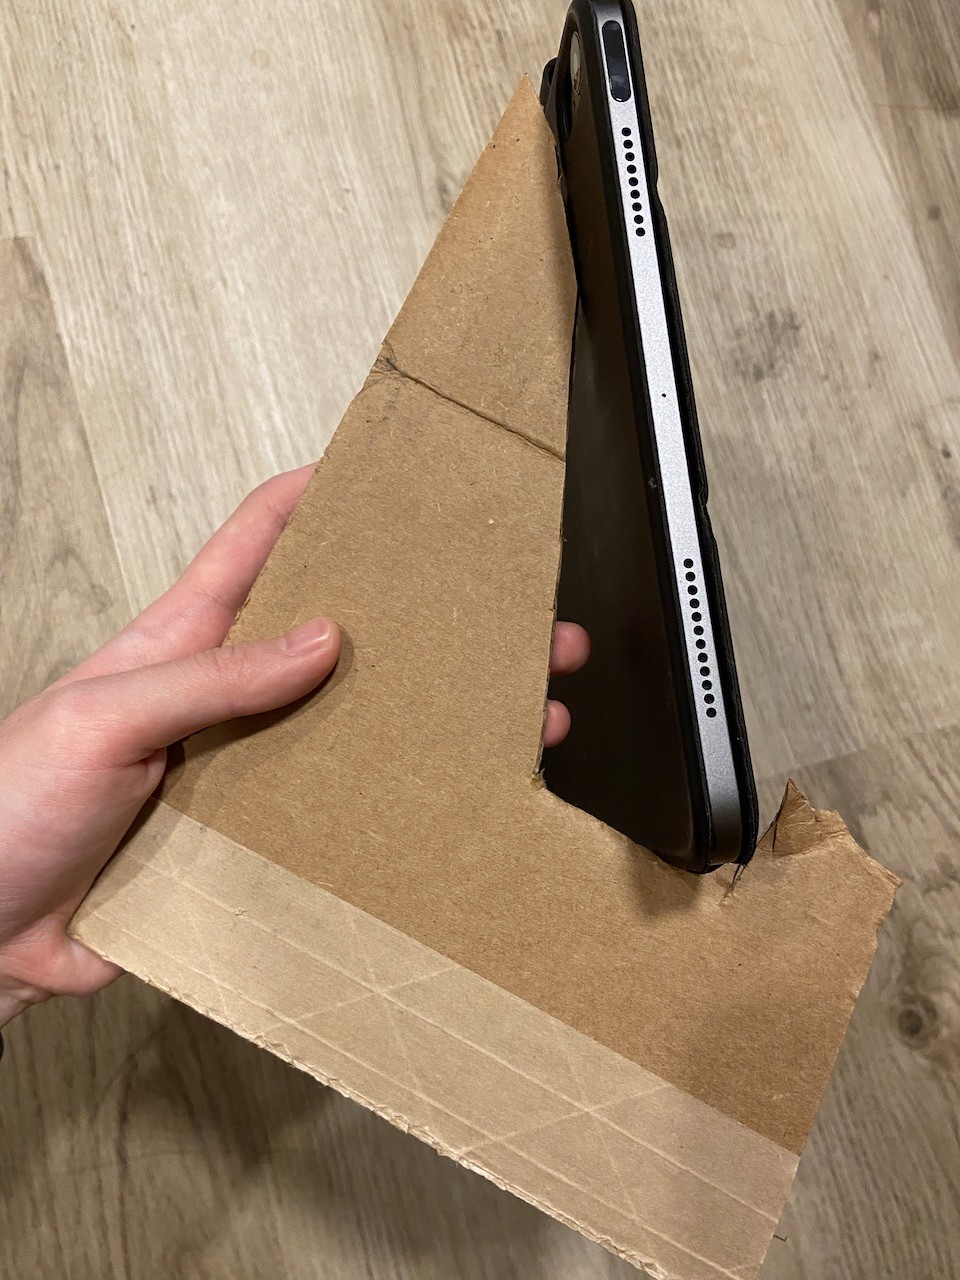
Using tablet to test out dimension of a vertical piece
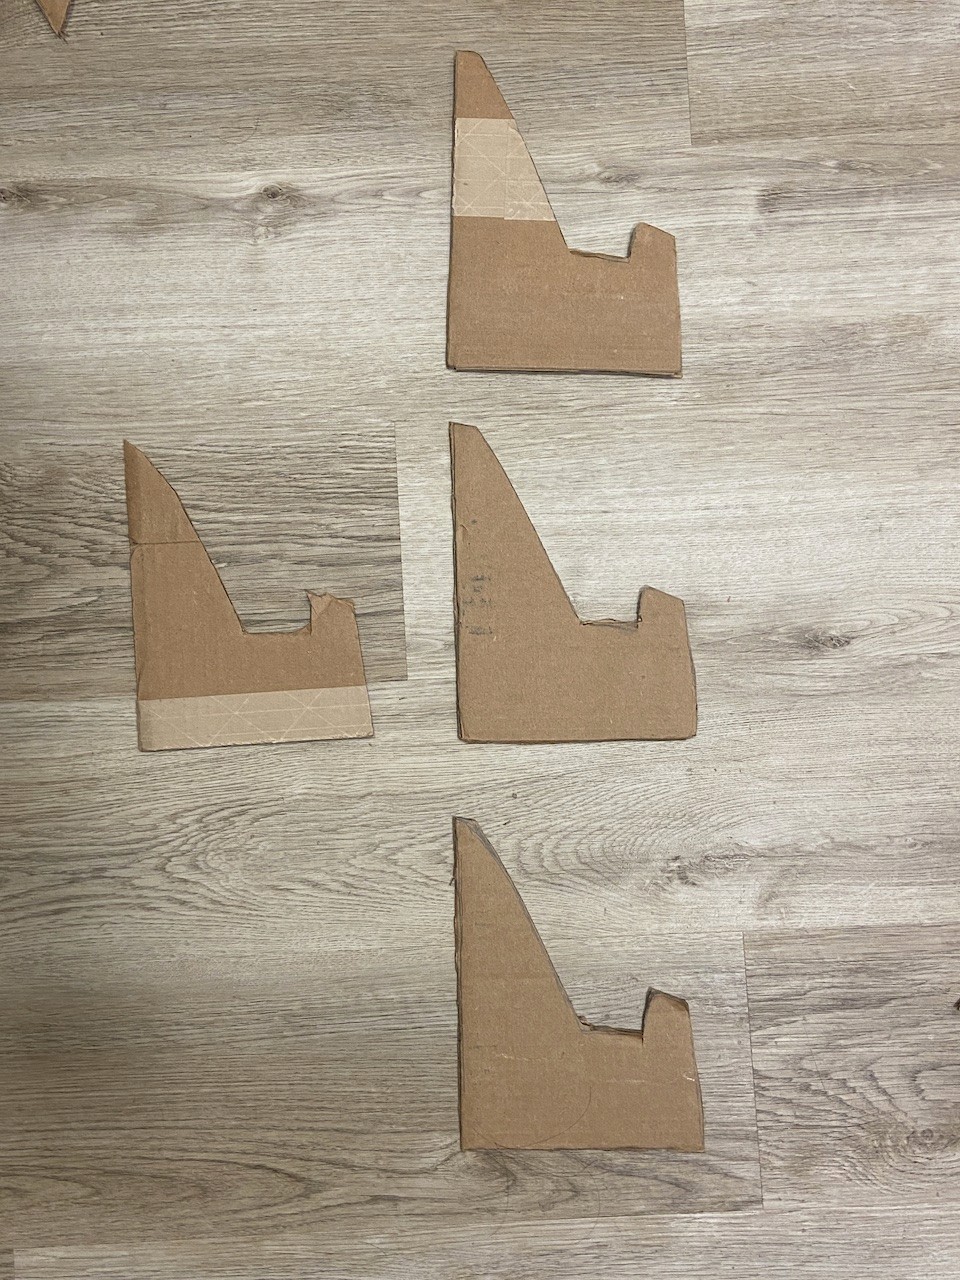
Different versions of the vertical pieces. Left: first try. Right: Improved design
Iteration #2: Laser Cutting
I used one flute board to create the second iteration using laser cutting technique.
Dimensions
Since one of the assignment requirements was that the design should be made from a limited material, I compared the total area of the five cardboard pieces from my first prototype with the area of the given flute material to make sure that the design is feasible to be cut from one flute sheet.
Modeling
I measured the dimensions of the first prototype and modeled my design in Adobe Illustrator. I intentionally made the slots’ width smaller than the thickness of the flute sheet to take into account of the kerf and increase the friction between materials. Learned from my previous prototype, I made the two side slots on the horizontal parts to be angled so that the vertical pieces can easily fit in the slots. Before I send the file to laser cutting, I made sure that each enclosed shape is a vector rather than raster so that the machine would cut through the material instead of etching on the surface.
The design is feasible to create with a single sheet of flute material

Measuring dimensions and modeling to scale in Illustrator
Laser Cutting
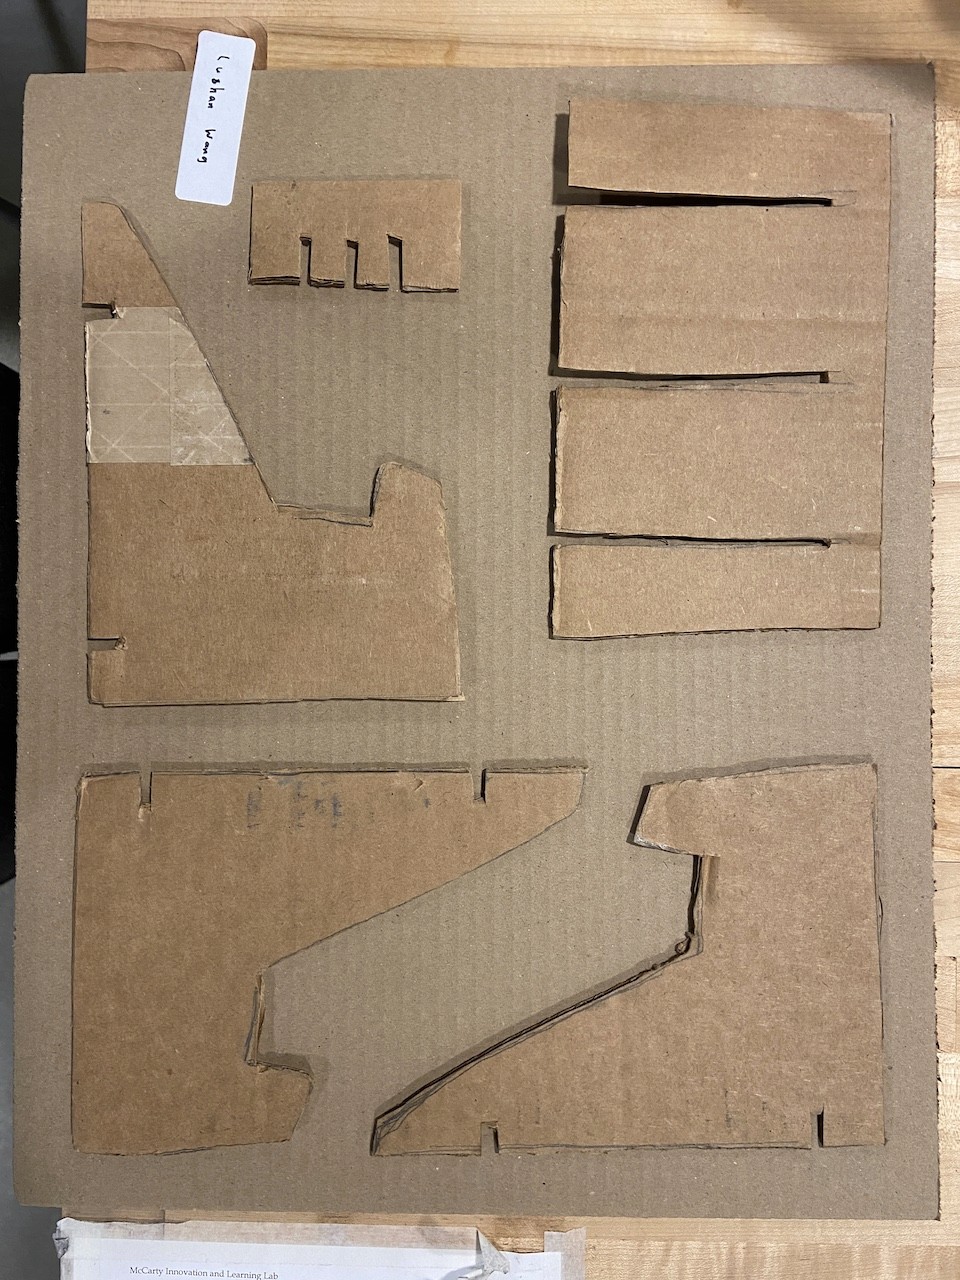
I used the laser cutting machine to cut out my design on a flute board.
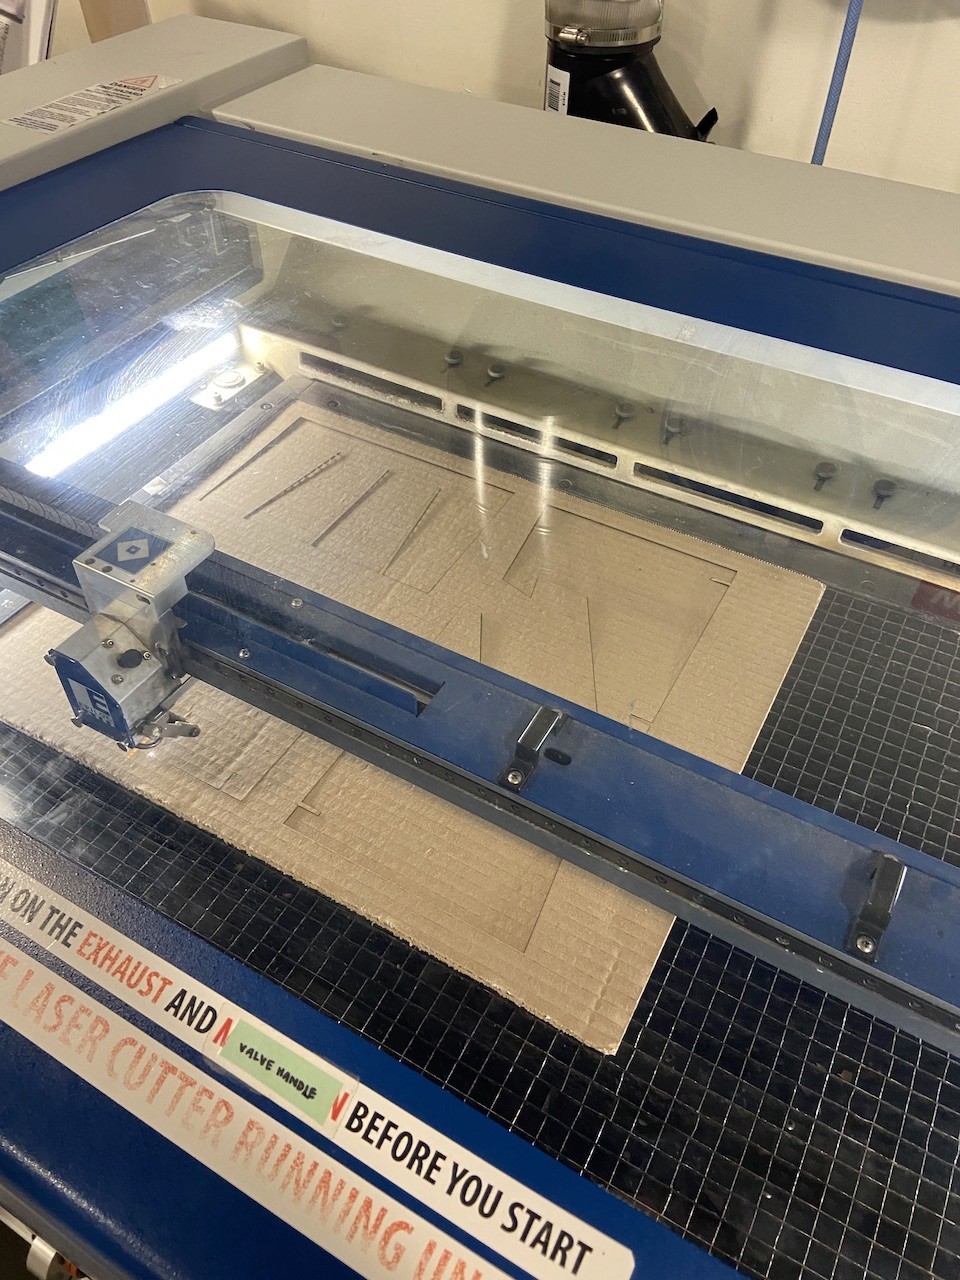
Laser cutting process
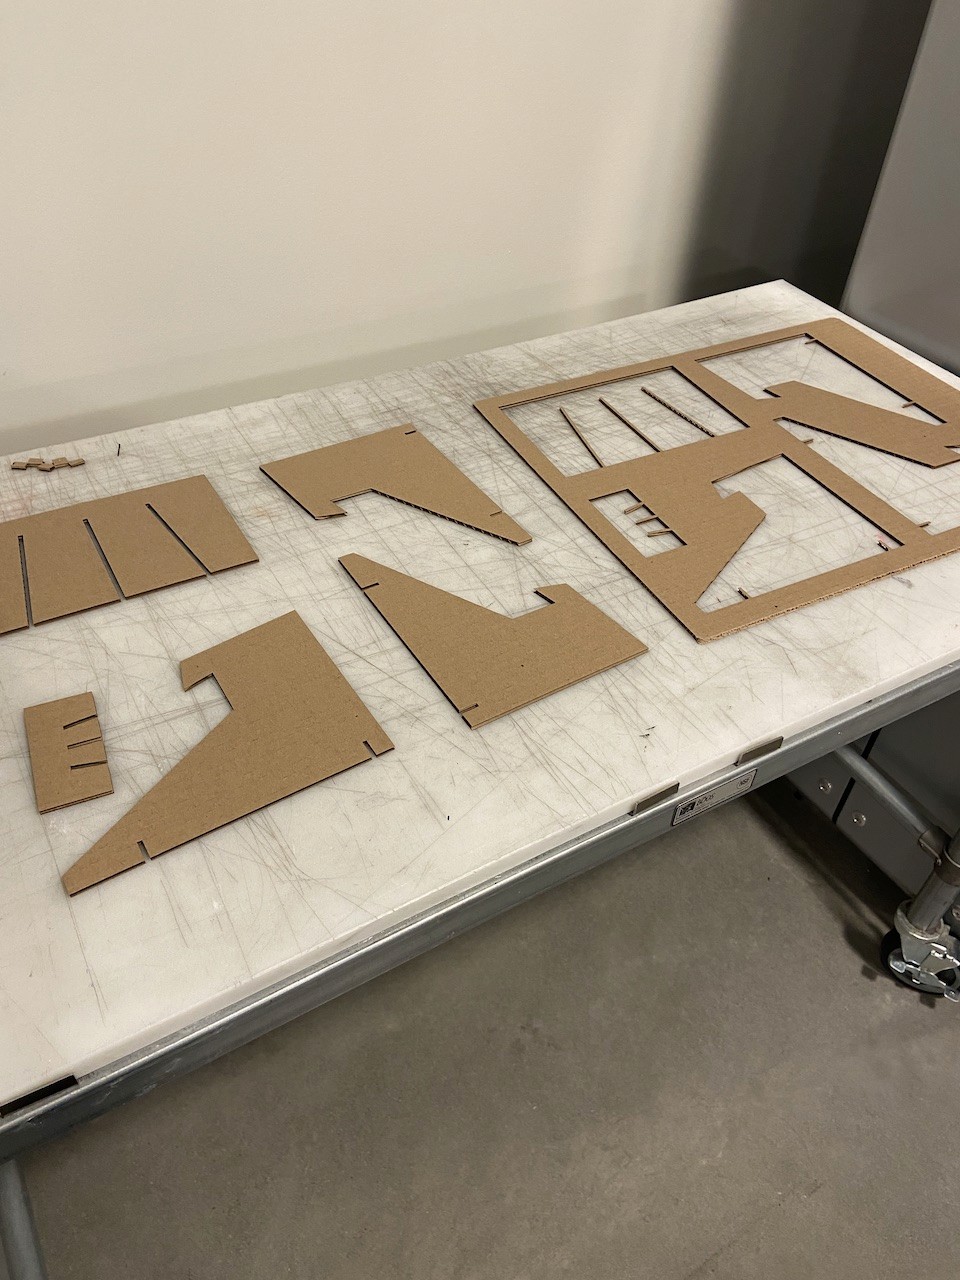
Laser-cut parts
Assembling Parts Together
Due to the changes made in the design of the slot’s angles and width, the parts tightly fit together and worked well to hold and support my tablet.
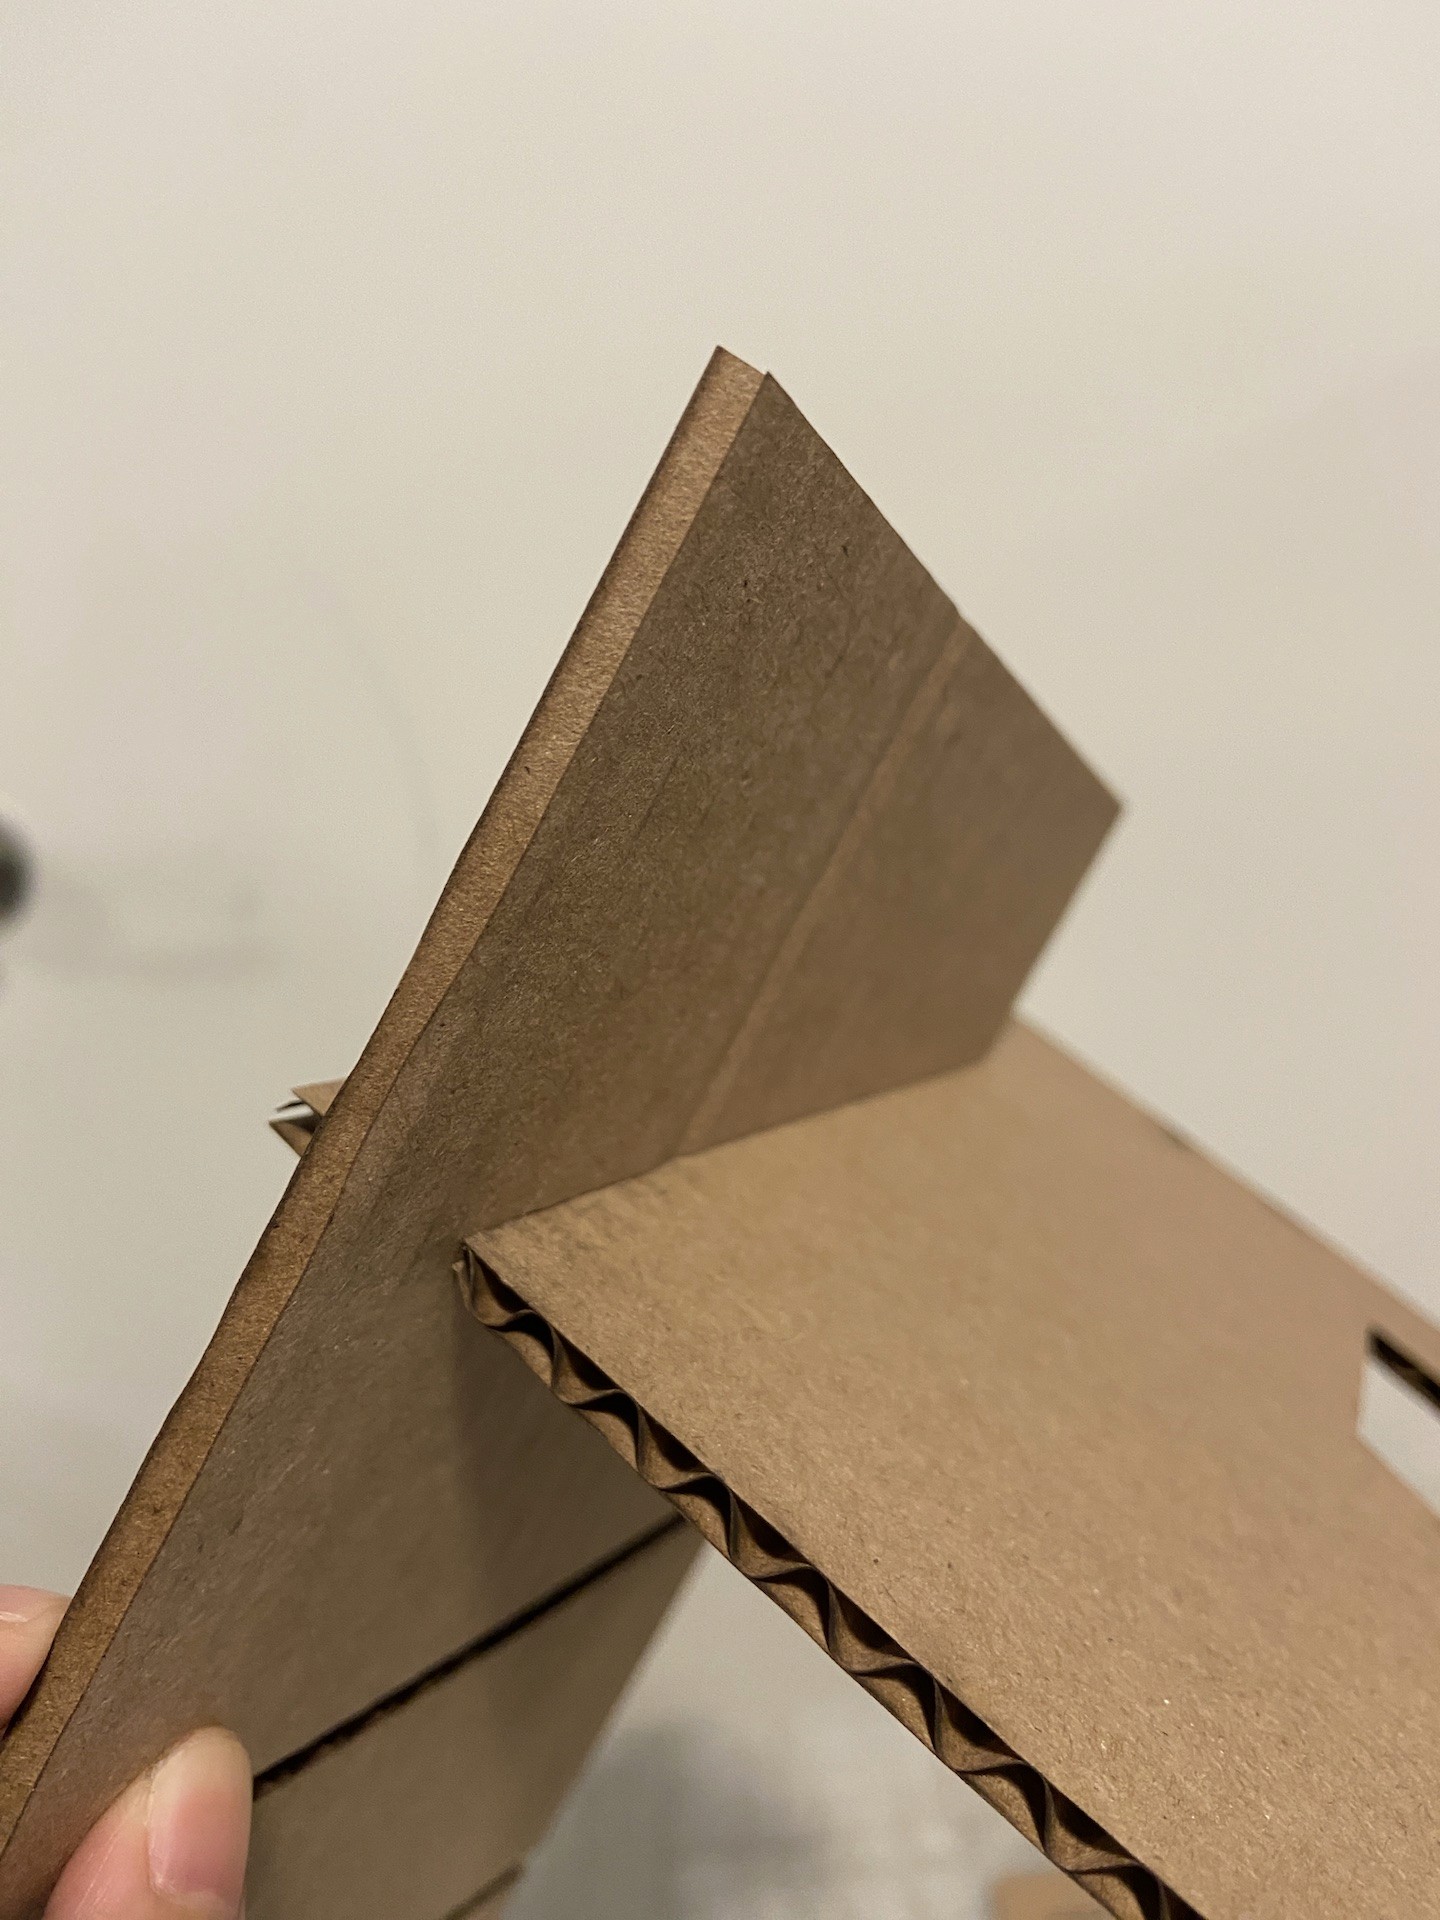
Fitting two pieces together
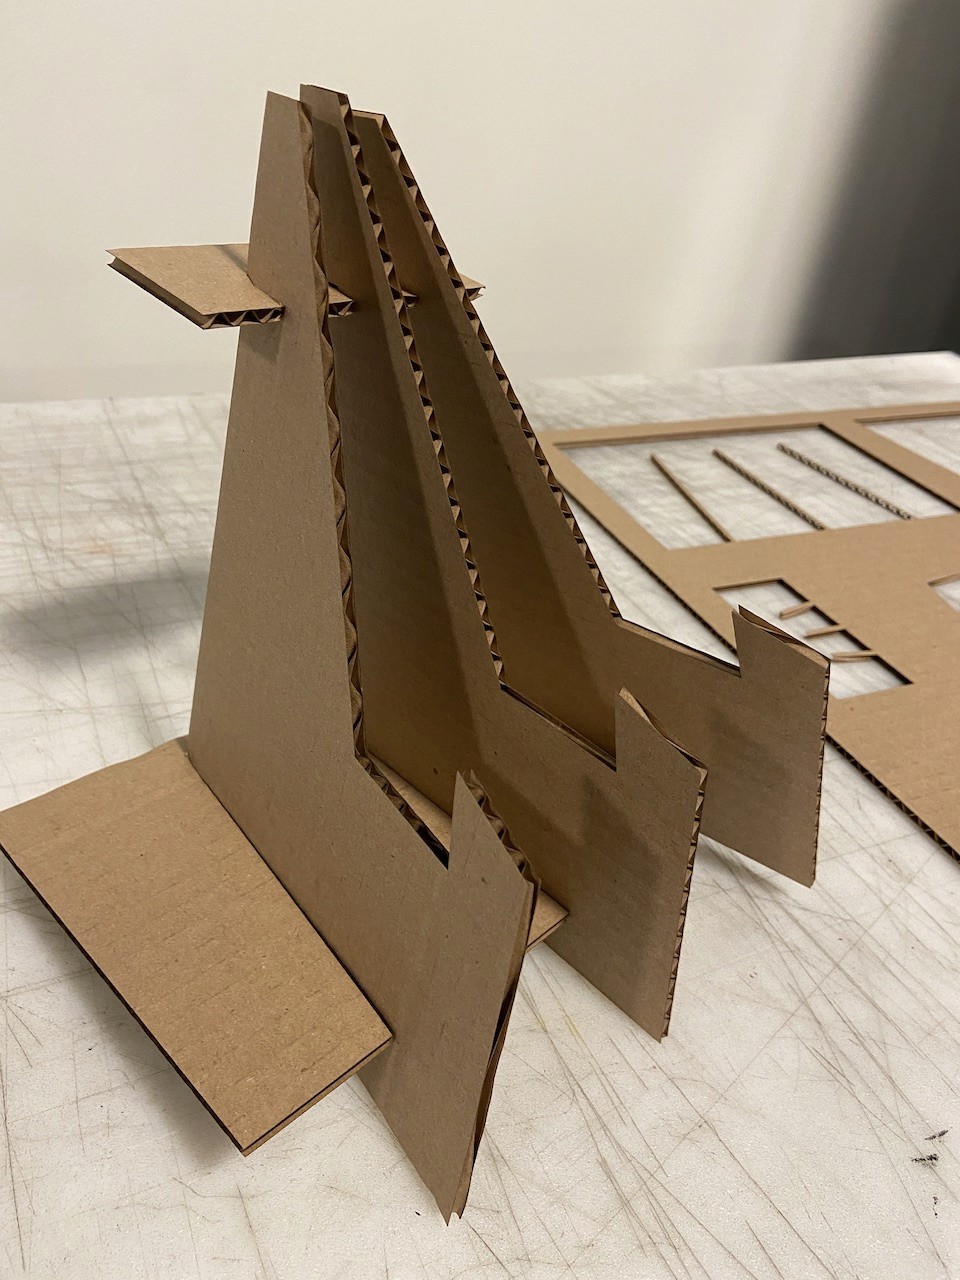
Assembled second prototype
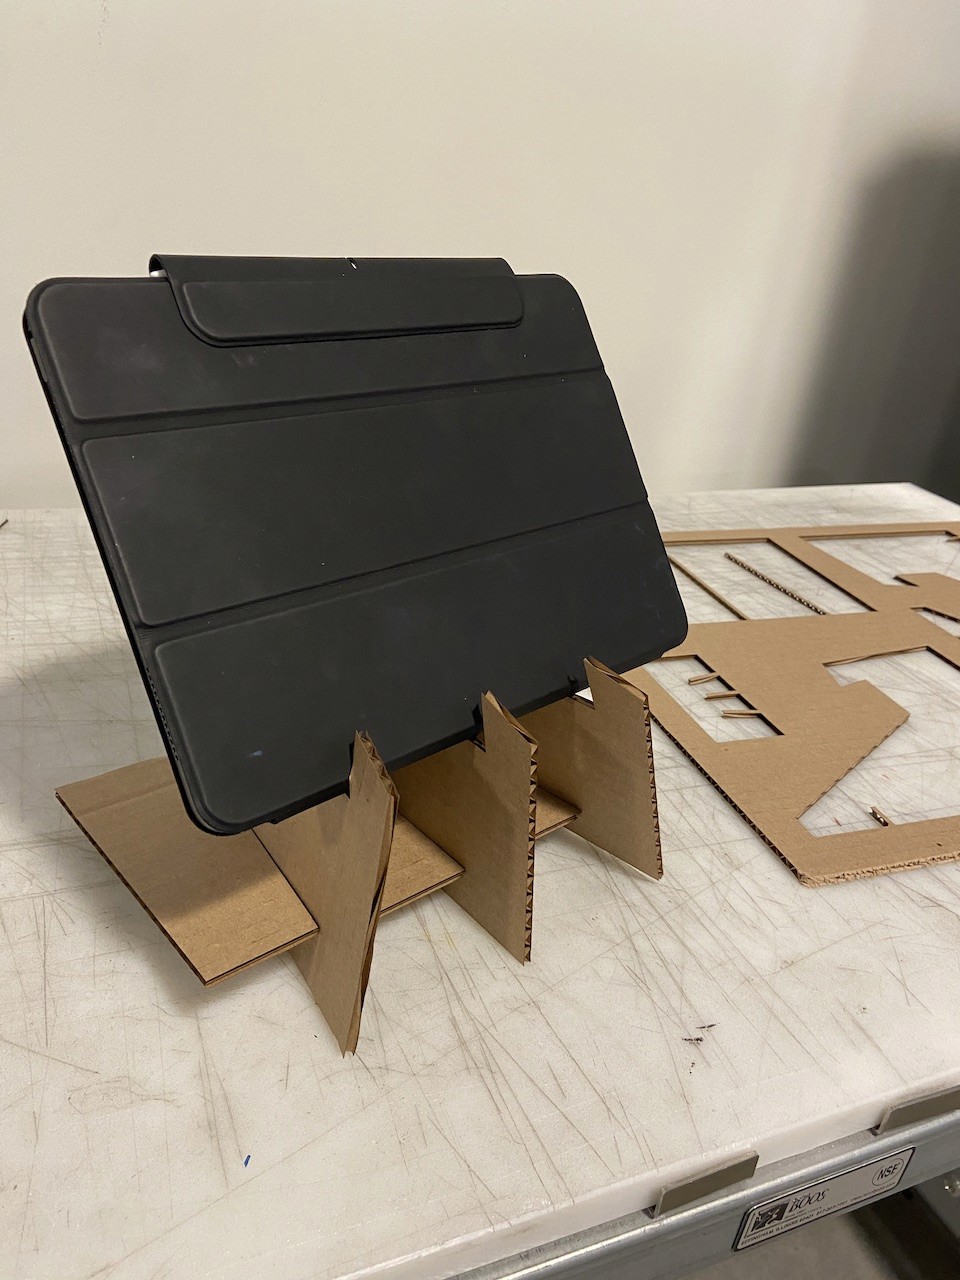
Prototype is able to hold and support a tablet
Analysis
Video Demo of User Test

Video of a Quick User Test
Feedback from Critique
What worked well?
The design is useful: The prototype is able to hold and support a tablet
Structure: The tightness of the joints makes it structurally sound
What could be improved?
Slot positions: The three vertical pieces are identical and causes the bending in the horizontal pieces bending. The slot on the middle piece could be moved a little bit lower to avoid such problem.
Redundant middle vertical piece: The prototype is able to provide the same functionality of holding a tablet when the middle vertical piece is removed.
Material & Technique: By inserting one flute piece at an angle (as opposed to orthogonally) into another piece to make a joint, the friction makes it possible to hold the pieces tight together. The reason why it worked was because flute is not a hard material, and the laser cutting technique may not work as well if I were to further iterate on a more rigid material. Therefore, in my next iteration, it might be interesting to experiment with different prototyping techniques, such as 3D printing, on more rigid materials.
Reflection
By using the laser cutting technique and the materiality of flute, I created a tablet stand that can be assembled without using any glue and dissembled very easily. I practiced designing a file on Adobe illustrator for laser cutting and operating a laser cutting machine. I learned about the difference between vector and raster in terms of laser cutting surface treatments: the laser cur through vector lines and etch raster lines. In the future, I hope to experiment with different materials and explore more on the potential design ideas with the laser cutting technique.
© 2023 Lushan Wang Portfolio. All rights reserved.